DIY Method To Make Aromatic and Colourful Candles at Home
If you want to relax at home, then nothing is as good as a burning wood wick and the delicate aroma of your favorite candle. However, even your favorite lavender aroma candle costs around $50. Is it worth it? You’ll be pleased to learn that making candles at home is incredibly simple and affordable, and you also get the added benefit of being able to produce a unique aroma that you might not have found in the store.
You just need to gather a few things which are easily available at Aussie Candle Supplies. Aussie Candle Supplies was founded in 2004. It started as a business that made candles and was one of the nation’s first importers and distributors of soy wax. It provides a wide selection of wholesale goods at wholesale cost. Everything needed to make candles, soap, cosmetics, essential oils, and more. All our customers can benefit from the wholesale price of our items.
A Complete Guide to Make Candles at Home
Raw Material
- Pot
- Electric stove
- Popsicle stick
- Container/mould
- Wick
- Wax
- Fragrance
- Colours/dye
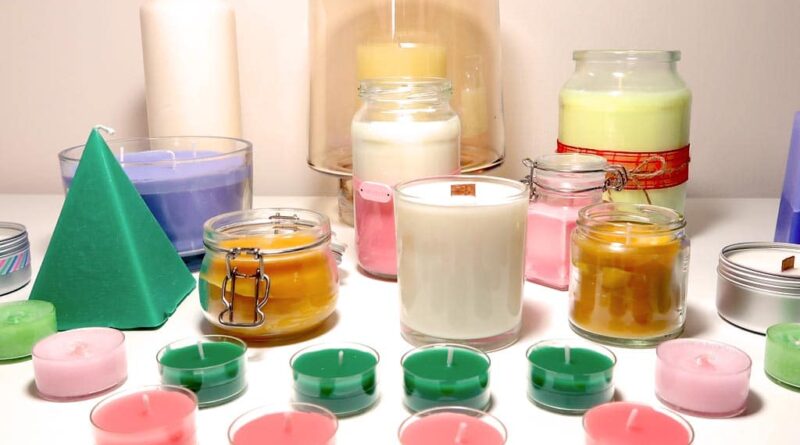
Guide 1: Single Colour Candle
Set the Wick Properly
Put your wick in the proper container/mould of your choice before adding the wax. It is better to reuse an empty candle jar because it is both economical and environmentally beneficial.
Warm to Melt Wax
Place the pot over an electric stove or hot plate. Add wax (plain white or colourful wax) and allow it to melt. If desired, colour/dye and aroma can also be added to the melted wax in the pot.
Pour Melted Wax into Mould
Pour the melted wax into the container/mould with caution. To assist in keeping the candle and wick in the center, use skewers or popsicle sticks. Trim the wick to moderate size after allowing the wax to cool completely.
If you have reused a candle jar, then you can start using the candle, otherwise while removing from mould make sure you do it gently without chipping or breaking the wax from the side.
Guide 2: Multi-Layered Colour Wax
You must first divide your wax into two bowls if you’re using two colours. If your mould or container is big enough, you can use as many colours and layers as you choose.
Select the colour or colours you want to use, and then get them ready.
Melt your wax to prepare it
Before you start melting the wax, divide your wax pellets in half if you’re using two colours, and save one half aside for later. Melt all your wax together if you’re constructing a multi-tonal candle.
Dye your wax
In the same manner that we described in the solid colour guide above. If you have multicolour layer start with light colours as we will be pouring that first into the candle jar or mould.
Pour melted wax
Now follow the above guide of placing the wick into the jar and holding it with a popsicle stick or skewer. Now pour the wax (with a lighter tone first) and wait for it to harden. This is because f you pour another colour of wax into the mould, it will mix not providing the desired layers you wanted. Once the first layer hardens, follow the same process with other tones.
Making a candle at home is simple. To make life easier and healthier use soy wax instead of paraffin wax.


