A detailed guide on building a Pergola on deck
Introduction
Building your own deck pergola is a great way to add extra space and protection to the outdoors. The pergola can serve as an outdoor dining area, sunroom or even a place where you can grow vegetables in the spring and summer. If you are thinking about building one, there are some things that need to be taken into consideration before you start.
Why you should build a Pergola on deck
Pergolas are a great way to add shade to your deck and provide an additional place for relaxing. They can be built with a variety of materials, so they’re easy to customize and customize. Pergola kits are available for purchase on Amazon, making it even easier to get started!
What is a pergola?
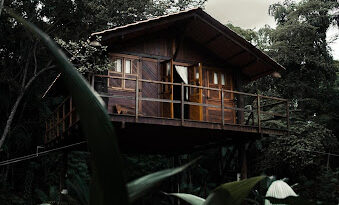
A pergola is a type of arbor, or covered structure that provides shade and shelter. Pergolas range from simple to complex, depending on their design and materials used. They are often constructed from wooden posts and beams with ornate trusses that provide support for the roofing material such as shingles or tiles. Pergolas can be built in the shape of a square, rectangle or circle.
Things to Consider before Building a Pergola on your deck.
- Check with your local building department.
- Check with your homeowners association.
- Check for zoning restrictions. If you live in an area that requires a certain type of pergola, there may be some restrictions on what type of structure can be built on a deck or balcony, so it’s important that you check before starting construction work on the project itself. This is especially true if the area where your new pergola on deck will go has been recently developed and passed through by city officials, as they may have laid out guidelines for how those structures should look like (e.g., no more than two stories high). You’ll also want to double-check whether or not there are any wind loading requirements associated with building something like this; if yours is too strong then perhaps another solution would suit better instead?
Permitting for a Pergola
Permits are required for building anything on your property. They’re also required for building a pergola on your deck, in your backyard and front yard.
- Permits will be issued by the city of Los Angeles Department of Building and Safety (DBS). If you don’t have an adequate permit in place before starting construction work on any structure—including a pergola—you risk being fined up to $25,000!
Calculating the Cost of Building a Pergola on Your Deck
There are a number of costs related to building a pergola on your deck. The first is the cost of materials: lumber, hardware and other supplies needed for construction. This can vary depending on the size and complexity of your design. You’ll also need to factor in labor costs if you’re hiring someone else to do this work for you or if you decide that it’s necessary for safety reasons (for example, if working alone).
The next consideration has less to do with money than time: permits and inspections may be necessary before starting any major construction project on your deck area; they’ll require an inspection from local authorities such as fire marshals and building departments.
Laying Down the Foundation for Your Pergola
The first step is to lay down a solid foundation for your pergola. This can be done with any kind of soil, but it’s important that you have a level surface to build on. If you don’t have access to level ground, then check with your local council or building regulations officer before starting construction work (and then check again).
If there is no way of laying down a solid base without disturbing the ground too much, try using sand, gravel or concrete instead of just plain old dirt! Each type has its own pros and cons so choose one based on what suits best in terms of cost/benefit ratio (Cost: Materials + Time).
Designing and Planning Your DIY Deck Pergola
When planning your deck pergola, it’s important to keep in mind the size of your deck. The size of the area where you intend to build your pergola should be large enough so that you can safely accommodate all of its components and make sure there is space for an attractive plant bed at ground level.
For example, if you have a small patio that has just enough room for one person on each side (or even less), then building an expansive six-foot by five-foot pergola might not be ideal because there isn’t enough room left over for other features like seating or lighting fixtures—and they could end up looking cluttered when placed near one another!
On the other hand, if someone wants to entertain friends away from home without having them walk through mud or snow then perhaps having something as simple as a traditional trellis would work best since guests won’t need much assistance getting inside either side thereof.
Buying your deck pergola kits or hiring a carpenter.
If you’d like to buy a kit, it will be available from many different sources. The price of these kits can range anywhere from $300 to $1,000 depending on the quality of materials and construction. You’ll also need to consider how much time and effort you’ll put into building your pergola once it has been delivered.
If hiring a carpenter is more convenient for your schedule, then this might be the best option for you. You can get estimates online or simply ask friends who have built similar structures in the past what they paid and how long it took them—but keep in mind that each person has their own style when it comes time for construction!
Build the posts of your pergola.
Now that you have your pergola framework, it’s time to start building the posts.
- Level the posts. The first step in constructing a deck is leveling each post before attaching it to the deck and making sure they’re all straight and parallel to one another. If any are not level, use some sandpaper or a leveler tool (such as those sold at home improvement stores) and make sure everything is perfectly straight before proceeding with their construction.
- Attach them to the deck with screws on both sides of each post so that when pressure is applied against them by people walking on them, they won’t move along their length but instead stay firmly planted where they were placed initially!
Build the deck pergola frame.
Now that the deck is framed, you can start to install your pergola. First, cut all of the beams and gussets to size. This is a very important step because it will ensure that your structure is sturdy and safe for use in weather extremes. Next, screw down all of the posts with 2-inch screws so they’re firmly attached to their base plates (which are already installed).
Next up: installing purlins and rafters! These two components help support the structure above ground level while allowing air circulation through them—and keeping leaves off of your face when enjoying coffee on a sunny day! To do this job properly requires some special tools like saws designed specifically for woodworking applications like these; make sure not only does each blade have teeth set at an angle but also has plenty of clearance between them–this ensures smooth cutting without creating any additional friction.
Install the purlins and rafters in place.
Now that you have all of your materials, it’s time to get them in place. The purlins are the supporting beams that connect one side of the decking to another. They’re made from 2×4 boards, so they’ll be heavy and difficult to handle by yourself (unless you have super-human strength). To install them:
- Attach one end of each board with screws through each joist into place on top of your decking structure; this will help keep everything stable during construction and later on when attaching rails or whatever else may need support from above.
- Make sure all four corners are level with each other before moving onto step 3!
Add the gussets and fasten the beams together.
- Add the gussets and fasten the beams together.
- Gussets are used to connect the beams, and they can be made from wood, metal or plastic. They’re usually attached to one side of each beam with screws or nails. The other end of each gusset sits against another piece of wood that’s been cut for this purpose; this creates an overlapping joint between two pieces of wood (or metal). It’s important not to over-compress these joints so as not to weaken them—a good rule of thumb is 1/4 inch per foot (1/2 inch on large projects).
You can build your own pergola in just a few days with some woodworking skills
To build your own pergola, you’ll need to buy the materials and tools needed. You will also have to be willing to spend some time working on it.
- Wood: You can use anything from treated lumber for decks and siding to pressure-treated wood for pergolas. If you want a more rustic look, choose untreated lumber or even old-growth timber from a local tree farm.
- Fasteners: You will need screws (and possibly nails), as well as some additional hardware such as brackets or ties that can hold up your structure while it dries before painting over them with stain or sealant afterward.* Saws: A circular saw is ideal because they vibrate less than table saws do when cutting through branches at high speeds; however, any tool capable of cutting through branches should work just fine.* Drills: A hand drill works well if all else fails—it’s easy enough just set it down on something solid while holding onto its handle with one hand while drilling into whatever needs drilling outwards/downwards/into another piece of wood before moving onto something else again!
Conclusion
We hope that this guide has been helpful in giving you a better idea of what it takes to build a pergola on your deck. If you ever have any questions or concerns, feel free to contact us at any time! We’re here for you whether it be by phone or email and we look forward to hearing from you soon!