Chimney Pointing: Essential Maintenance for Longevity and Safety
Chimney pointing is a crucial maintenance task that helps preserve the structural integrity and aesthetic appeal of your chimney. Over time, the mortar between the bricks of a chimney can deteriorate due to weathering and other factors. This article explores the importance of chimney pointing, signs that indicate it is needed, and the steps involved in the process.
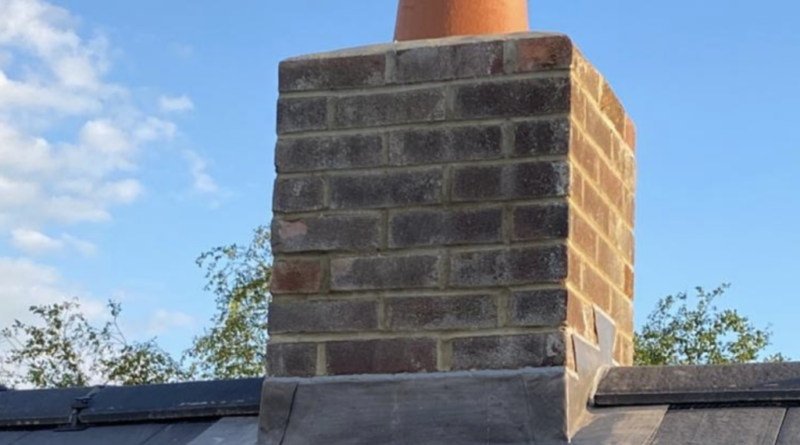
What is Chimney Pointing?
Chimney pointing, also known as repointing, involves removing and replacing the damaged mortar between the bricks of a chimney. This process helps maintain the stability and functionality of the chimney while also enhancing its appearance.
Why Chimney Pointing is Important
- Structural Integrity: The mortar holds the bricks together, providing stability to the chimney. Over time, weather conditions and environmental factors can cause the mortar to erode, weakening the overall structure. Pointing restores the strength of the chimney.
- Preventing Water Damage: Damaged mortar joints allow water to penetrate the brickwork, leading to dampness, mold growth, and further deterioration. Proper pointing seals the joints, preventing water infiltration and protecting the chimney from moisture damage.
- Aesthetic Appeal: Pointing improves the appearance of the chimney by providing clean, well-defined lines between the bricks. This enhances the overall look of the building, making it more visually appealing.
- Safety: A well-maintained chimney is safer to use. Crumbling mortar can lead to loose bricks, which can pose a hazard. Repointing ensures the chimney remains safe and functional.
Signs That Indicate the Need for Chimney Pointing
Identifying the signs of mortar deterioration early can help prevent more significant damage and costly repairs. Here are some common indicators that your chimney needs pointing:
1. Cracked or Crumbling Mortar
Cracks or crumbling mortar between bricks are clear signs that the mortar has deteriorated. This can lead to loose or shifting bricks if not addressed promptly.
2. Gaps in Mortar Joints
Visible gaps or voids in the mortar joints indicate that the mortar has eroded, leaving spaces that can allow water and debris to enter.
3. Efflorescence
Efflorescence is a white, powdery substance that appears on the surface of bricks. It indicates that water is infiltrating the brickwork and bringing salts to the surface, a sign of compromised mortar joints.
4. Loose Bricks
Bricks that feel loose or can be easily moved are a clear indication that the mortar holding them in place has weakened and needs to be replaced.
5. Dampness or Leaks
If you notice dampness or leaks around the chimney, it could be a sign that the mortar joints are no longer providing adequate weatherproofing.
The Chimney Pointing Process
Pointing is a meticulous process that requires attention to detail and precision. Here’s an overview of the typical steps involved in chimney pointing:
1. Inspection and Preparation
The first step is to inspect the chimney and assess the extent of mortar damage. Once identified, the area is prepared by cleaning the brick surface and removing any loose debris.
2. Removing Old Mortar
Using specialized tools such as a chisel, hammer, or angle grinder, the old and damaged mortar is carefully removed from the joints. It’s essential to avoid damaging the surrounding bricks during this process.
3. Mixing New Mortar
The new mortar should match the original in composition and color as closely as possible. This helps maintain the structural and aesthetic consistency of the chimney. The mortar is typically a mixture of sand, lime, and cement.
4. Applying New Mortar
The new mortar is applied to the joints using a pointing trowel. It is essential to press the mortar firmly into the joints to eliminate air pockets and ensure a solid bond. The joints are then smoothed and shaped to match the original brickwork pattern.
5. Curing and Finishing
Once the mortar has been applied, it needs to cure properly. This involves keeping the mortar damp for several days to ensure it sets correctly. After curing, the chimney is cleaned to remove any excess mortar and achieve a clean finish.
Tips for Effective Chimney Pointing
To achieve the best results in chimney pointing, consider the following tips:
1. Use the Right Tools
Invest in high-quality tools designed specifically for pointing. This includes pointing trowels, mortar rakes, and jointing tools. The right tools make the job easier and ensure precise application.
2. Match the Mortar
Matching the new mortar to the existing one in terms of composition and color is crucial for maintaining the chimney’s consistency. Conduct tests on small sections to ensure a perfect match before proceeding with the entire project.
3. Work in Small Sections
To prevent the mortar from drying out too quickly, work in small sections. This allows you to apply and tool the mortar before it sets, ensuring a strong bond and a smooth finish.
4. Protect the Brickwork
During the pointing process, protect the surrounding brickwork from mortar stains by using masking tape or plastic sheeting. This will help maintain the clean appearance of the bricks.
Conclusion
Chimney pointing is an essential maintenance task that preserves the structural integrity and visual appeal of chimneys. By understanding the importance of pointing, recognizing the signs of mortar deterioration, and following the proper techniques, you can ensure your chimney remains sturdy and beautiful for years to come. Whether you undertake a DIY project or hire professionals, the art of chimney pointing is an investment in the longevity and charm of your chimney.

